What happens when we end up needing more than one form for any event? This is common when you have an adult event that also offers child care. This is a great opportunity to register both parents and children at the same time. Create one form for adults and another for child care. Make sure you use the age range option to make it easy to register for the event.
So, as you learned previously, the address of each form is unique and displays in the Web User panel in the Form Summary. If we do not use aggregate forms, we will need to put two different address links on our website ‐ one for child care and one for the adult event.
That’s ok, but a little inconvenient. Instead, use the aggregate forms option to combine the forms together into a single form web address.
When you have limited access to your website, aggregate forms allow you to manage event registrations with minimal effort. For example, you can create an aggregate form that combines all your active forms together into a single form link.
As mentioned before, aggregate forms work by combining two or more forms together into a single form link. If you remember to put age ranges and start date and end date ranges on your forms, then aggregate forms pretty much manage themselves.
Let’s look at an actual example to see how they work. At Dynamic Church, several active forms are available. In addition to spreading the individual form links throughout the website, administrator’s create an aggregate form and place a button on the home page of the website. Text just above the button lists information on the events going on. The button text reads Register Now.
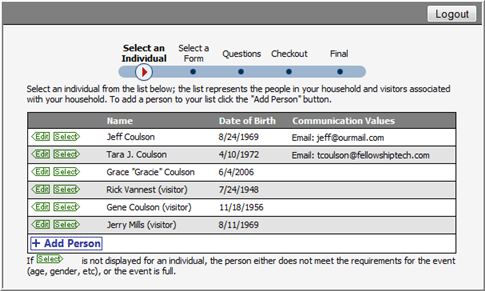
When users click they button they are directed to first log in and then are presented with the household listing.
There is a Select link beside every household member’s name. This is because, within the aggregate form, there are forms that apply to every family member. However, when the user clicks select beside any name, the forms that display are only those that apply to that household member.
For example, if we click Select beside the father, we will see forms that only apply to adult males as shown below.
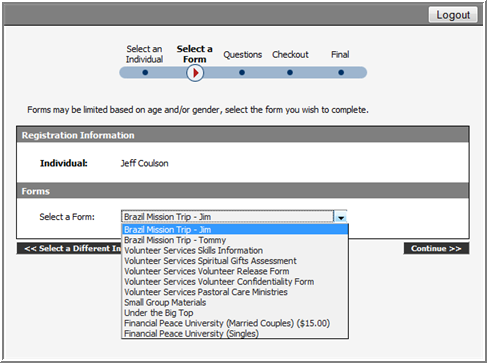
However, when we click Select beside other people in the household, we will see a different list of forms depending upon the household member, his or her gender and age.
Aggregate forms can be created at any time and for any purpose. Combine forms together by Ministry, by Event, or just because. Aggregate forms are great especially when you have little access to your website. You can add a registration link to your website that accesses an aggregate form. The forms that display in the aggregate are entirely up to you and controlled behind the scenes in Fellowship One. Happily, the link to the aggregate form never changes ‐ no matter how many times you update it.
To create an aggregate form
Tip! We suggest you add the word “Aggregate” or similar to your form name. This will help you differentiate between event forms and aggregate forms when you are running form builder reports in the Report Library.
As stated before, the true power of aggregate forms is in the fact that you can control the visible forms from behind the scenes in Fellowship One without having to update your website. When you want to add or remove forms from the aggregate form use the following procedure.
To add/remove forms from an aggregate form
Note: Happily, the web address for your aggregate form will not change as you modify it!